How to Visualize a Notion Database in Tableau
In this tutorial, you will learn how to connect Anyquery to Notion and visualize your data in Tableau. This can be useful for creating detailed reports and dashboards based on your Notion data.
Prerequisites
Before you begin, ensure you have the following:
- A working installation of Anyquery. Follow the installation instructions here: Anyquery Installation Guide.
- A Notion account with a database you want to visualize.
- Tableau Desktop installed and activated.
Step 1: Set Up the Notion Plugin in Anyquery
You'll need to install and configure the Notion Plugin for Anyquery:
Install the Notion plugin:
anyquery install notionCreate a Notion Integration and Get the Token:
- Go to Notion's My Integrations page.
- Click on
+ New integrationand fill out the necessary information. - Copy the integration token.
- Share the database with the integration by clicking on the
Sharebutton on the top right corner of your Notion database and selecting your integration.
Provide the Integration Token and Database ID to Anyquery:
- When prompted during installation, provide the integration token and the Notion database ID.
- The database ID can be found in the database URL. For example, in
https://www.notion.so/myworkspace/My-Database-1234567890abcdef1234567890abcdef, the database ID is1234567890abcdef1234567890abcdef.
Step 2: Launch the Anyquery Server
Start the Anyquery server to act as a MySQL server:
anyquery server
Step 3: Expose Anyquery Server to the Internet
If you're running Tableau on a different machine, use a tool like ngrok to expose the Anyquery server to the internet:
ngrok tcp 8070
Copy the forwarding URL (e.g., tcp://0.tcp.ngrok.io:12345) and use it as the hostname in the next step.
Step 4: Connect Tableau to Anyquery
Open Tableau Desktop and click on
MySQLin theConnectpane:Fill in the following details:
- Server: Use
127.0.0.1for local connections or the forwarding URL from ngrok (e.g.,0.tcp.ngrok.io). - Port: Use
8070for local connections or the port from ngrok (e.g.,12345). - Username: Set
rootunless you have set an auth-file. - Password: Leave it empty unless you have set an auth-file.
- Database:
main.
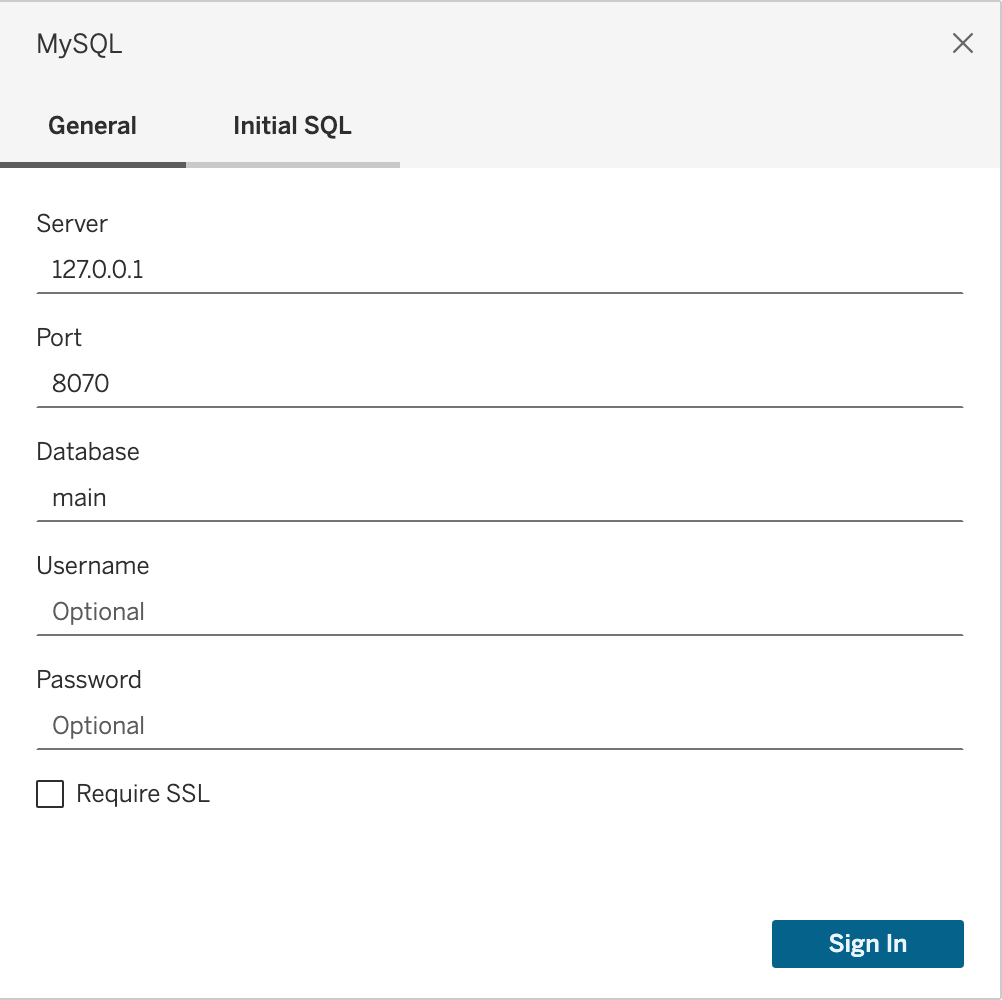
- Server: Use
Click on the
Sign Inbutton to verify that the connection is successful.
Step 5: Visualize Your Notion Data in Tableau
- On the left sidebar in Tableau, you will see the list of tables including your Notion database.
- Drag and drop the Notion table to the canvas to create a new worksheet.
- Use Tableau's visualization tools to create your dashboard. For example, you can drag columns to the Rows and Columns shelves, and use Marks to customize your visualizations.
Example Visualization
Here is an example of a simple visualization that shows a breakdown of tasks by status from a Notion task database:
- Drag the
Statuscolumn to the Rows shelf. - Drag the
Countmeasure to the Columns shelf. - Use the
Markscard to change the type of chart to a bar chart.

Conclusion
You have successfully connected Tableau to Anyquery and visualized your Notion database. Now you can create interactive dashboards and share them with your team.
For more details and troubleshooting, refer to the following documentation:
Happy visualizing!
