Visualize a Notion Database in Looker Studio (Google Data Studio)
In this tutorial, we will guide you through the process of visualizing a Notion database in Looker Studio (formerly Google Data Studio) using Anyquery. This involves querying your Notion database with Anyquery and visualizing the data in Looker Studio.
Prerequisites
Before starting, ensure you have the following:
- A working installation of Anyquery. See installation guide.
- A Notion account with a database you want to visualize.
- A Google account to access Looker Studio.
Step 1: Set Up Anyquery and Notion
Install Anyquery and the Notion Plugin
First, install Anyquery and the Notion plugin. Follow the Notion plugin integration guide to authenticate your Notion account and get the necessary credentials and database ID.
anyquery install notion
During setup, you will be prompted to provide your Notion API key and the Database ID of the Notion database you want to query.
Query the Notion Database
Ensure Anyquery can access your Notion database by running a query:
SELECT * FROM notion_database;
Replace notion_database with the name of your Notion database.
Step 2: Start Anyquery Server
Launch the Anyquery server which will act as a MySQL server:
anyquery server
Step 3: Expose Anyquery Server to the Internet
Because Looker Studio is a web-based tool, and Anyquery binds locally, you need to expose the server to the internet. You can use a tool like ngrok to create a secure tunnel to your local server.
ngrok tcp 8070
Copy the forwarding URL (e.g., tcp://0.tcp.ngrok.io:12345) and use it as the hostname in the next step.
Step 4: Connect Looker Studio
- Open Looker Studio in your browser.
- Click on the
+icon (empty report) to create a new report. - In the search bar, type
MySQLand select theMySQLconnection. - Authorize Looker Studio to access your data.
- Fill in the following details:
- Selecting a table does not work in Looker Studio. You can only run SQL queries by clicking on the "Personalized query" tab and typing your query. For example:
SELECT * FROM notion_database;
- Click on the
Authenticatebutton to verify that the connection is successful.
:::caution Looker Studio does not handle all column names well. If you have a column name with a space or special characters, you might not be able to pick it up as a dimension or measure. You can rename the column in the query to work around this issue. For example:
SELECT `Column With Spaces` AS `ColumnWithSpaces` FROM notion_database;
:::
Step 5: Create Visualizations in Looker Studio
Once connected, you can create various visualizations in Looker Studio using the data from your Notion database.
- Drag and drop the fields from your Notion database to the canvas to create charts and tables.
- Use the filtering and styling options in Looker Studio to customize the visualizations as per your requirements.
- Save and share your report with others.
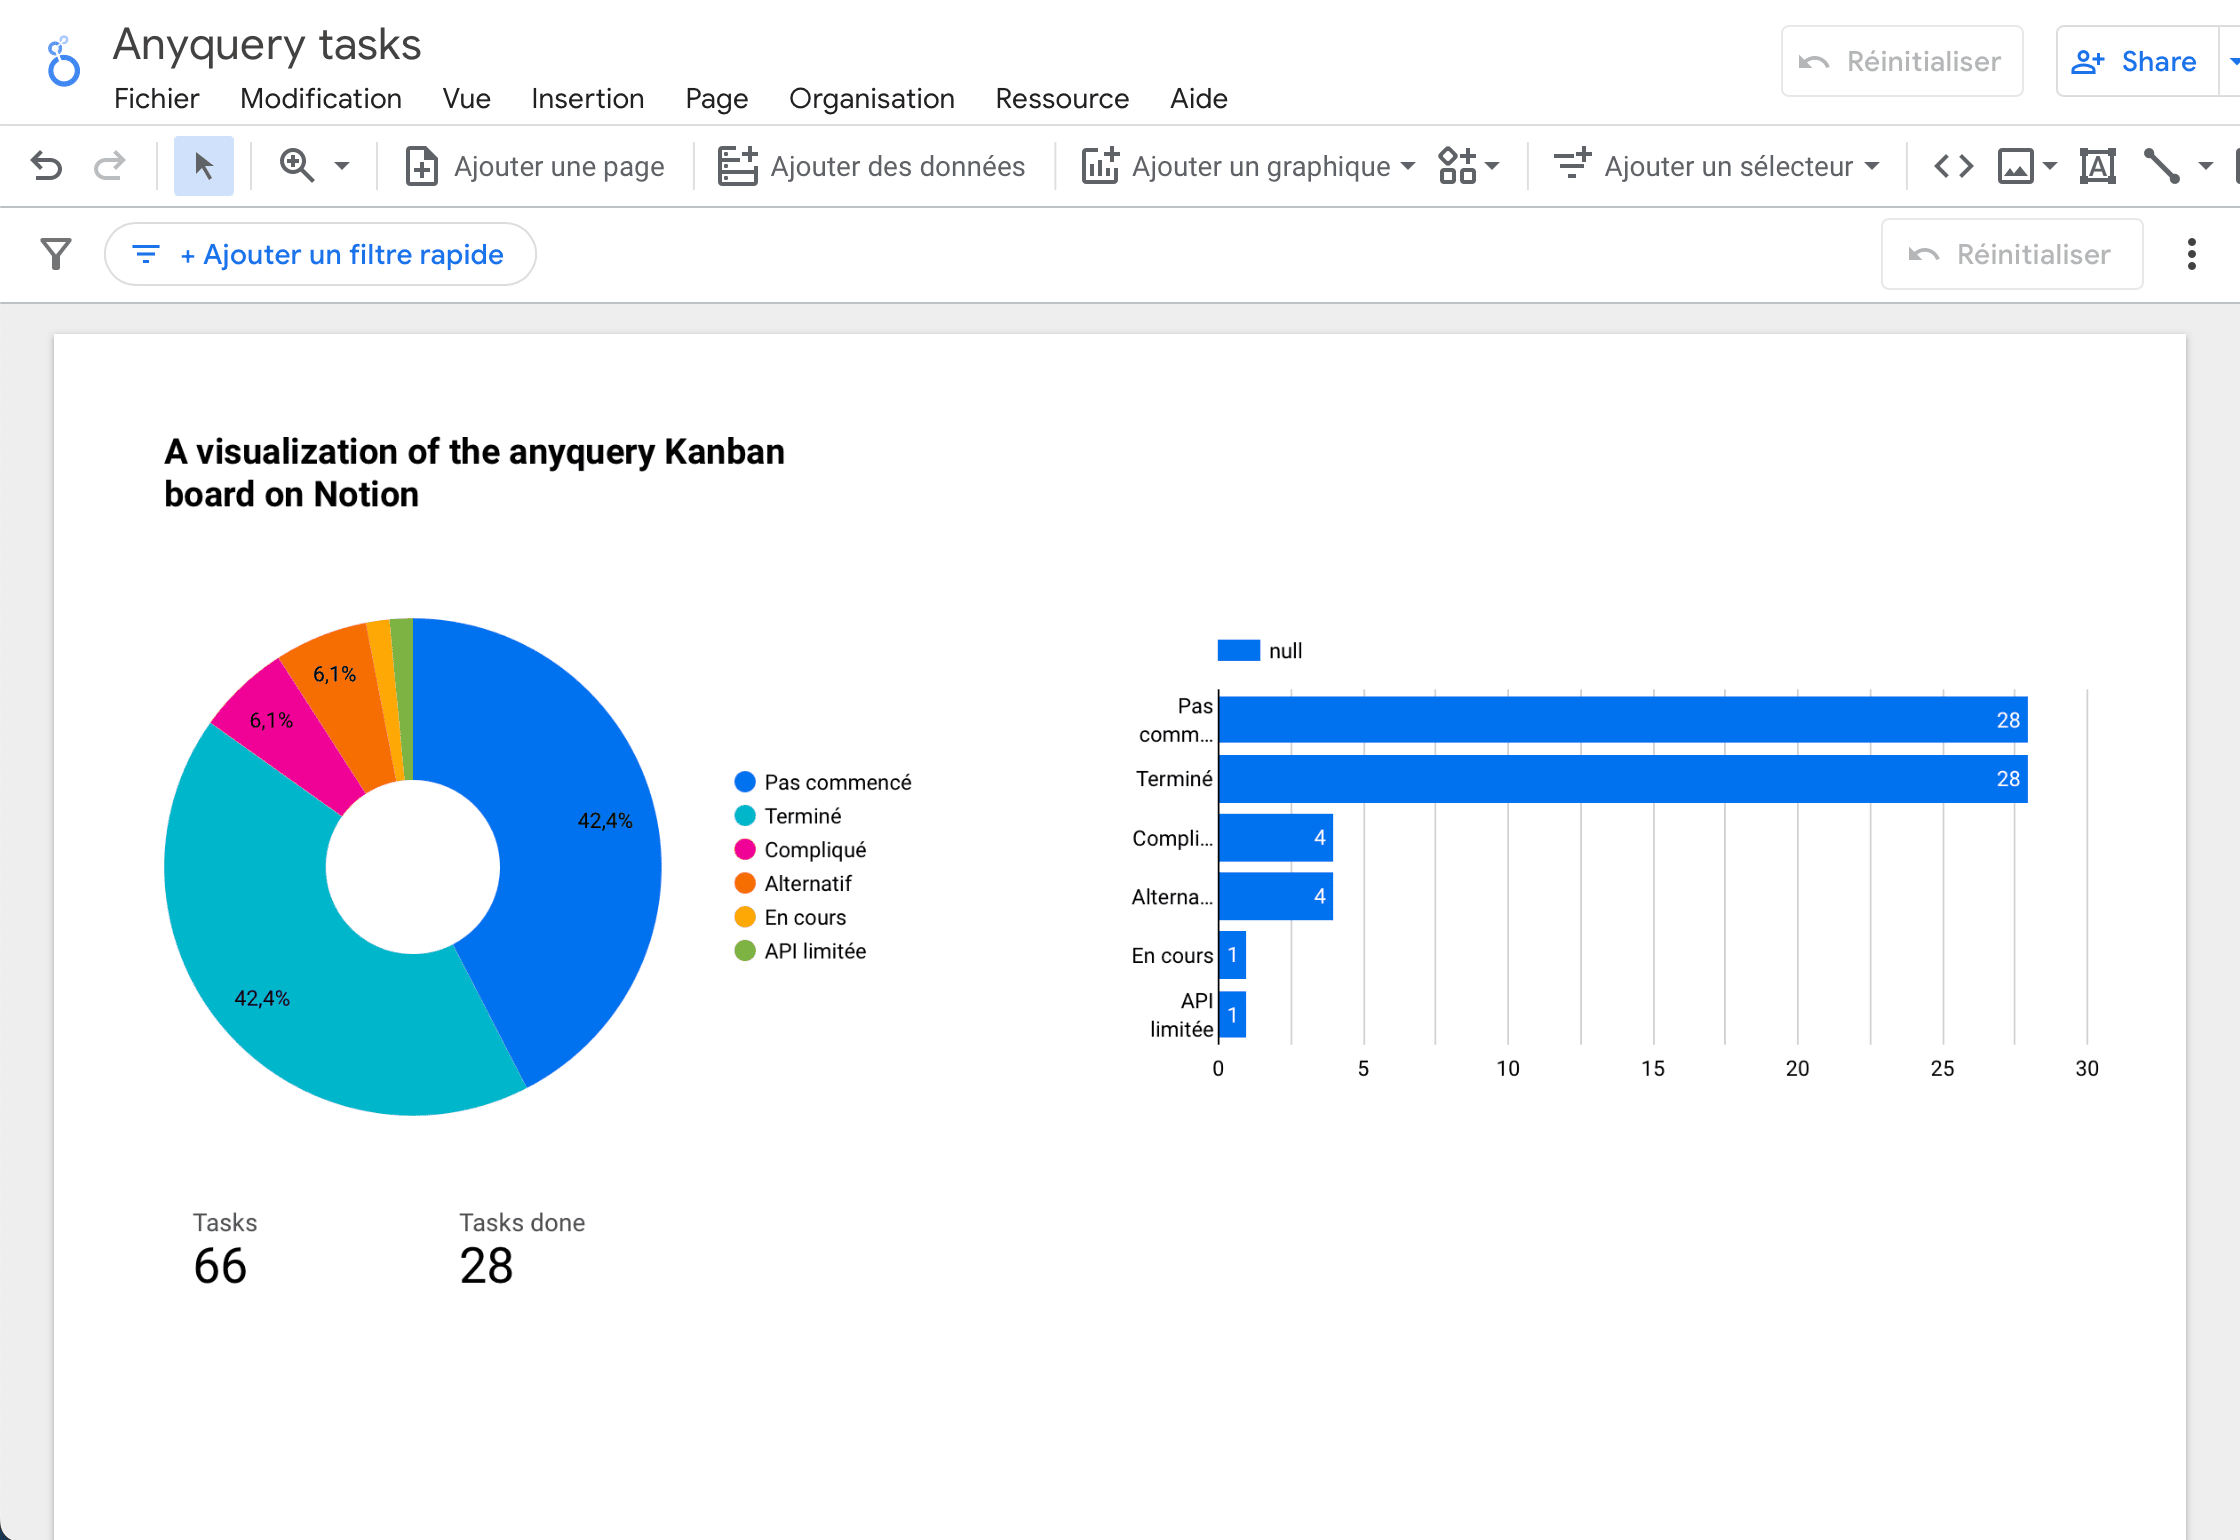
Example Visualization
For example, you can create a bar chart to visualize the task statuses in your Notion database:
- Drag the
Statusfield to theDimensionsection. - Drag the
Countfield to theMetricsection. - Customize the chart as needed and save your report.
Conclusion
You have successfully connected Looker Studio to Anyquery and visualized your Notion database. Now, you can explore and visualize data from any source using Looker Studio. For more information, refer to the Looker Studio integration guide.
For troubleshooting, visit the Anyquery troubleshooting guide.
