How to Visualize an Airtable Database in Metabase
In this tutorial, we'll learn how to connect Anyquery to an Airtable database and visualize it using Metabase. Anyquery is a SQL query engine that enables you to query data from various sources, including Airtable. Metabase is a powerful business intelligence tool that allows you to create and share data visualizations.
Prerequisites
Before starting, ensure you have the following:
- A working installation of Anyquery
- An Airtable account with a database (you must create the Airtable database before using it in Anyquery)
- Metabase running on Docker (instructions available on Metabase's website)
For installing Anyquery, refer to the installation documentation.
Step 1: Set up Anyquery with Airtable
Install Anyquery and Airtable Plugin: Run the following command to install the Airtable plugin for Anyquery:
anyquery install airtableAuthenticate with Airtable: Follow these steps to get your Airtable API key and set up Anyquery:
- Go to the Airtable API page and sign in.
- Select your base (database) from the list.
- Copy the API key from the top right corner of the page.
- Use the API key and the base ID to configure the Airtable plugin in Anyquery. The base ID can be found in the URL of the base (e.g., in
https://airtable.com/appWx9fD5JzAB4TIO/tblnTJJsUb8f7QjiM/viwDj8WIME?blocks=hide, the base ID isappWx9fD5JzAB4TIO).
anyquery profile new default airtable my_airtableFollow the prompts to input your API key and base ID.
Verify Connection: Run the following command to ensure the connection is working:
anyquery -q "SELECT * FROM my_airtable_airtable_table LIMIT 1"
Step 2: Launch Anyquery Server
Start the Anyquery server to allow remote connections:
anyquery server
Because Metabase is a web-based tool and Anyquery binds locally, you need to expose the server to the internet. Use a tool like ngrok to create a secure tunnel:
ngrok tcp 8070
Copy the forwarding URL (e.g., tcp://0.tcp.ngrok.io:12345) and use it as the hostname in the next step.
Step 3: Connect Metabase to Anyquery
Open Metabase Admin Panel:
- Open Metabase in your browser and navigate to the database settings:
https://{your-metabase-url}/admin/databases/create
- Open Metabase in your browser and navigate to the database settings:
Add a New Database Connection:
- Select MySQL as the database type.
- Fill in the following details:
- Name: A memorable name for the connection (e.g., "Airtable Database").
- Host: The forwarding URL from ngrok (e.g.,
0.tcp.ngrok.io) or127.0.0.1if you are running Metabase locally. - Port: The port from ngrok (e.g.,
12345) or8070if you are running Metabase locally. - Database name:
main. - Username: Set
rootunless you have set an auth-file. - Password: Leave it empty unless you have set an auth-file.
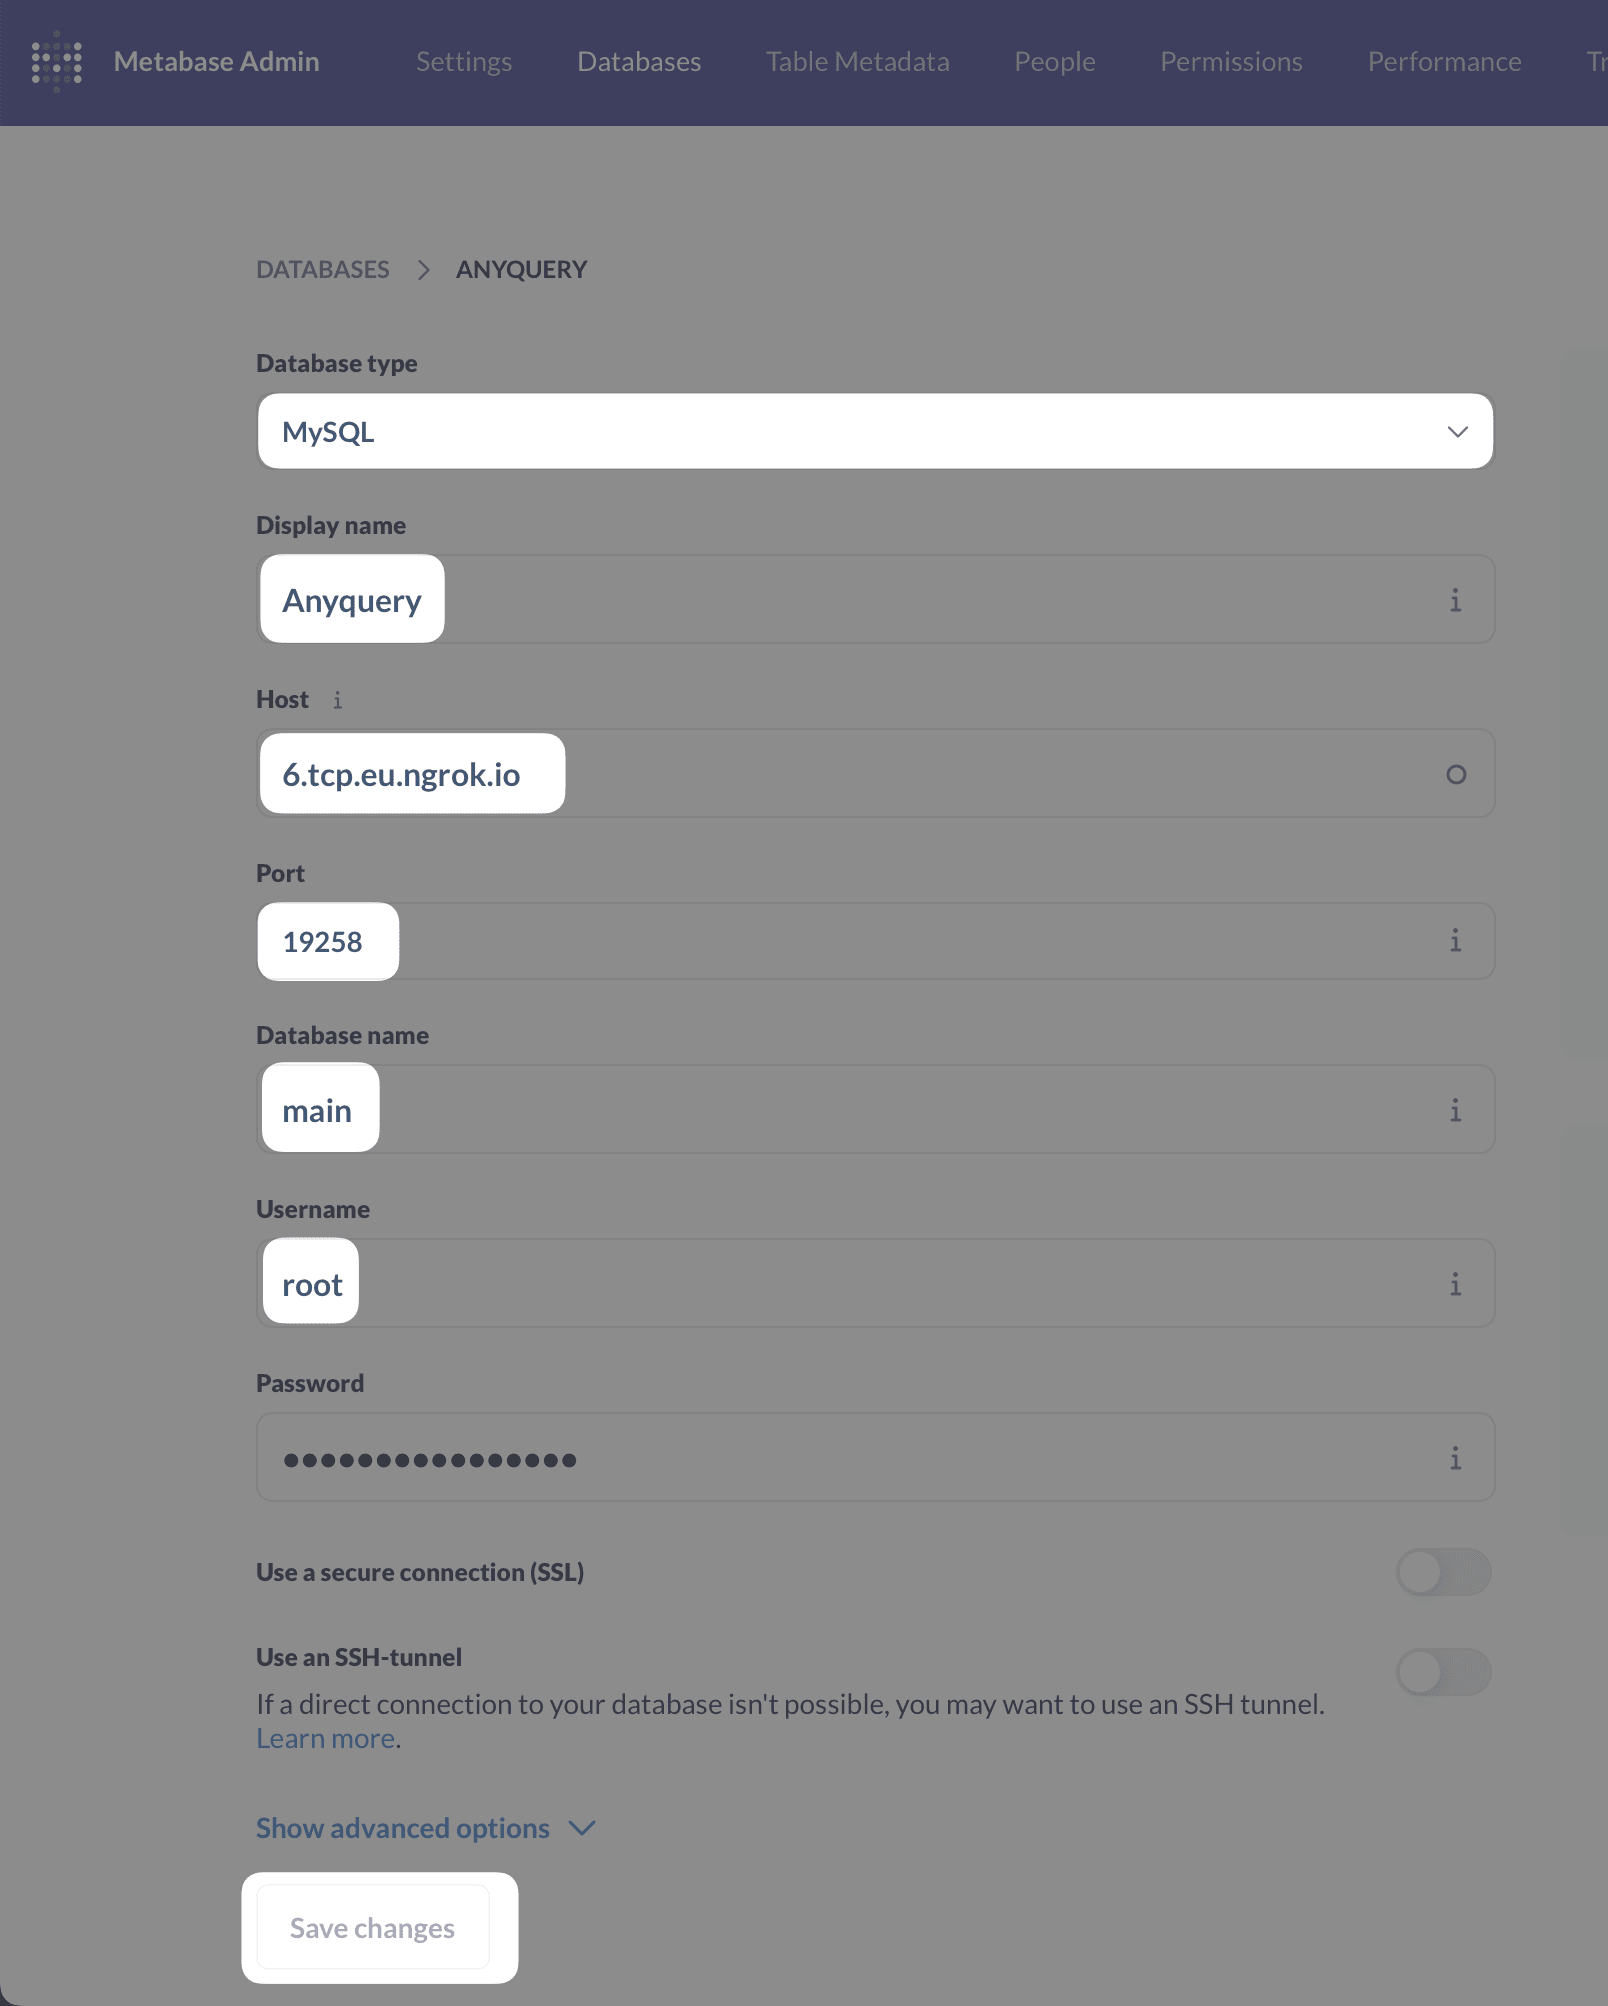
Save and Test Connection:
- Click on the
Savebutton to verify that the connection is successful.
- Click on the
Step 4: Create Visualizations in Metabase
Create a New Model with a Native Query:
- Click on the
+ Newbutton on the top right and selectModel, thenUse a native query. - Write a SQL query to select data from your Airtable database:
SELECT * FROM my_airtable_airtable_table; - Click on the ▶️ button (or run
⌘ + enter) to run the query. - Save the model (you can name it "Airtable Data").
- Click on the
Create a New Question:
- Click on the
+ Newbutton on the top right and selectQuestion. - Select the model you created and start building your visualization.
- For example, you can create a bar chart to visualize the data.
- Click on the
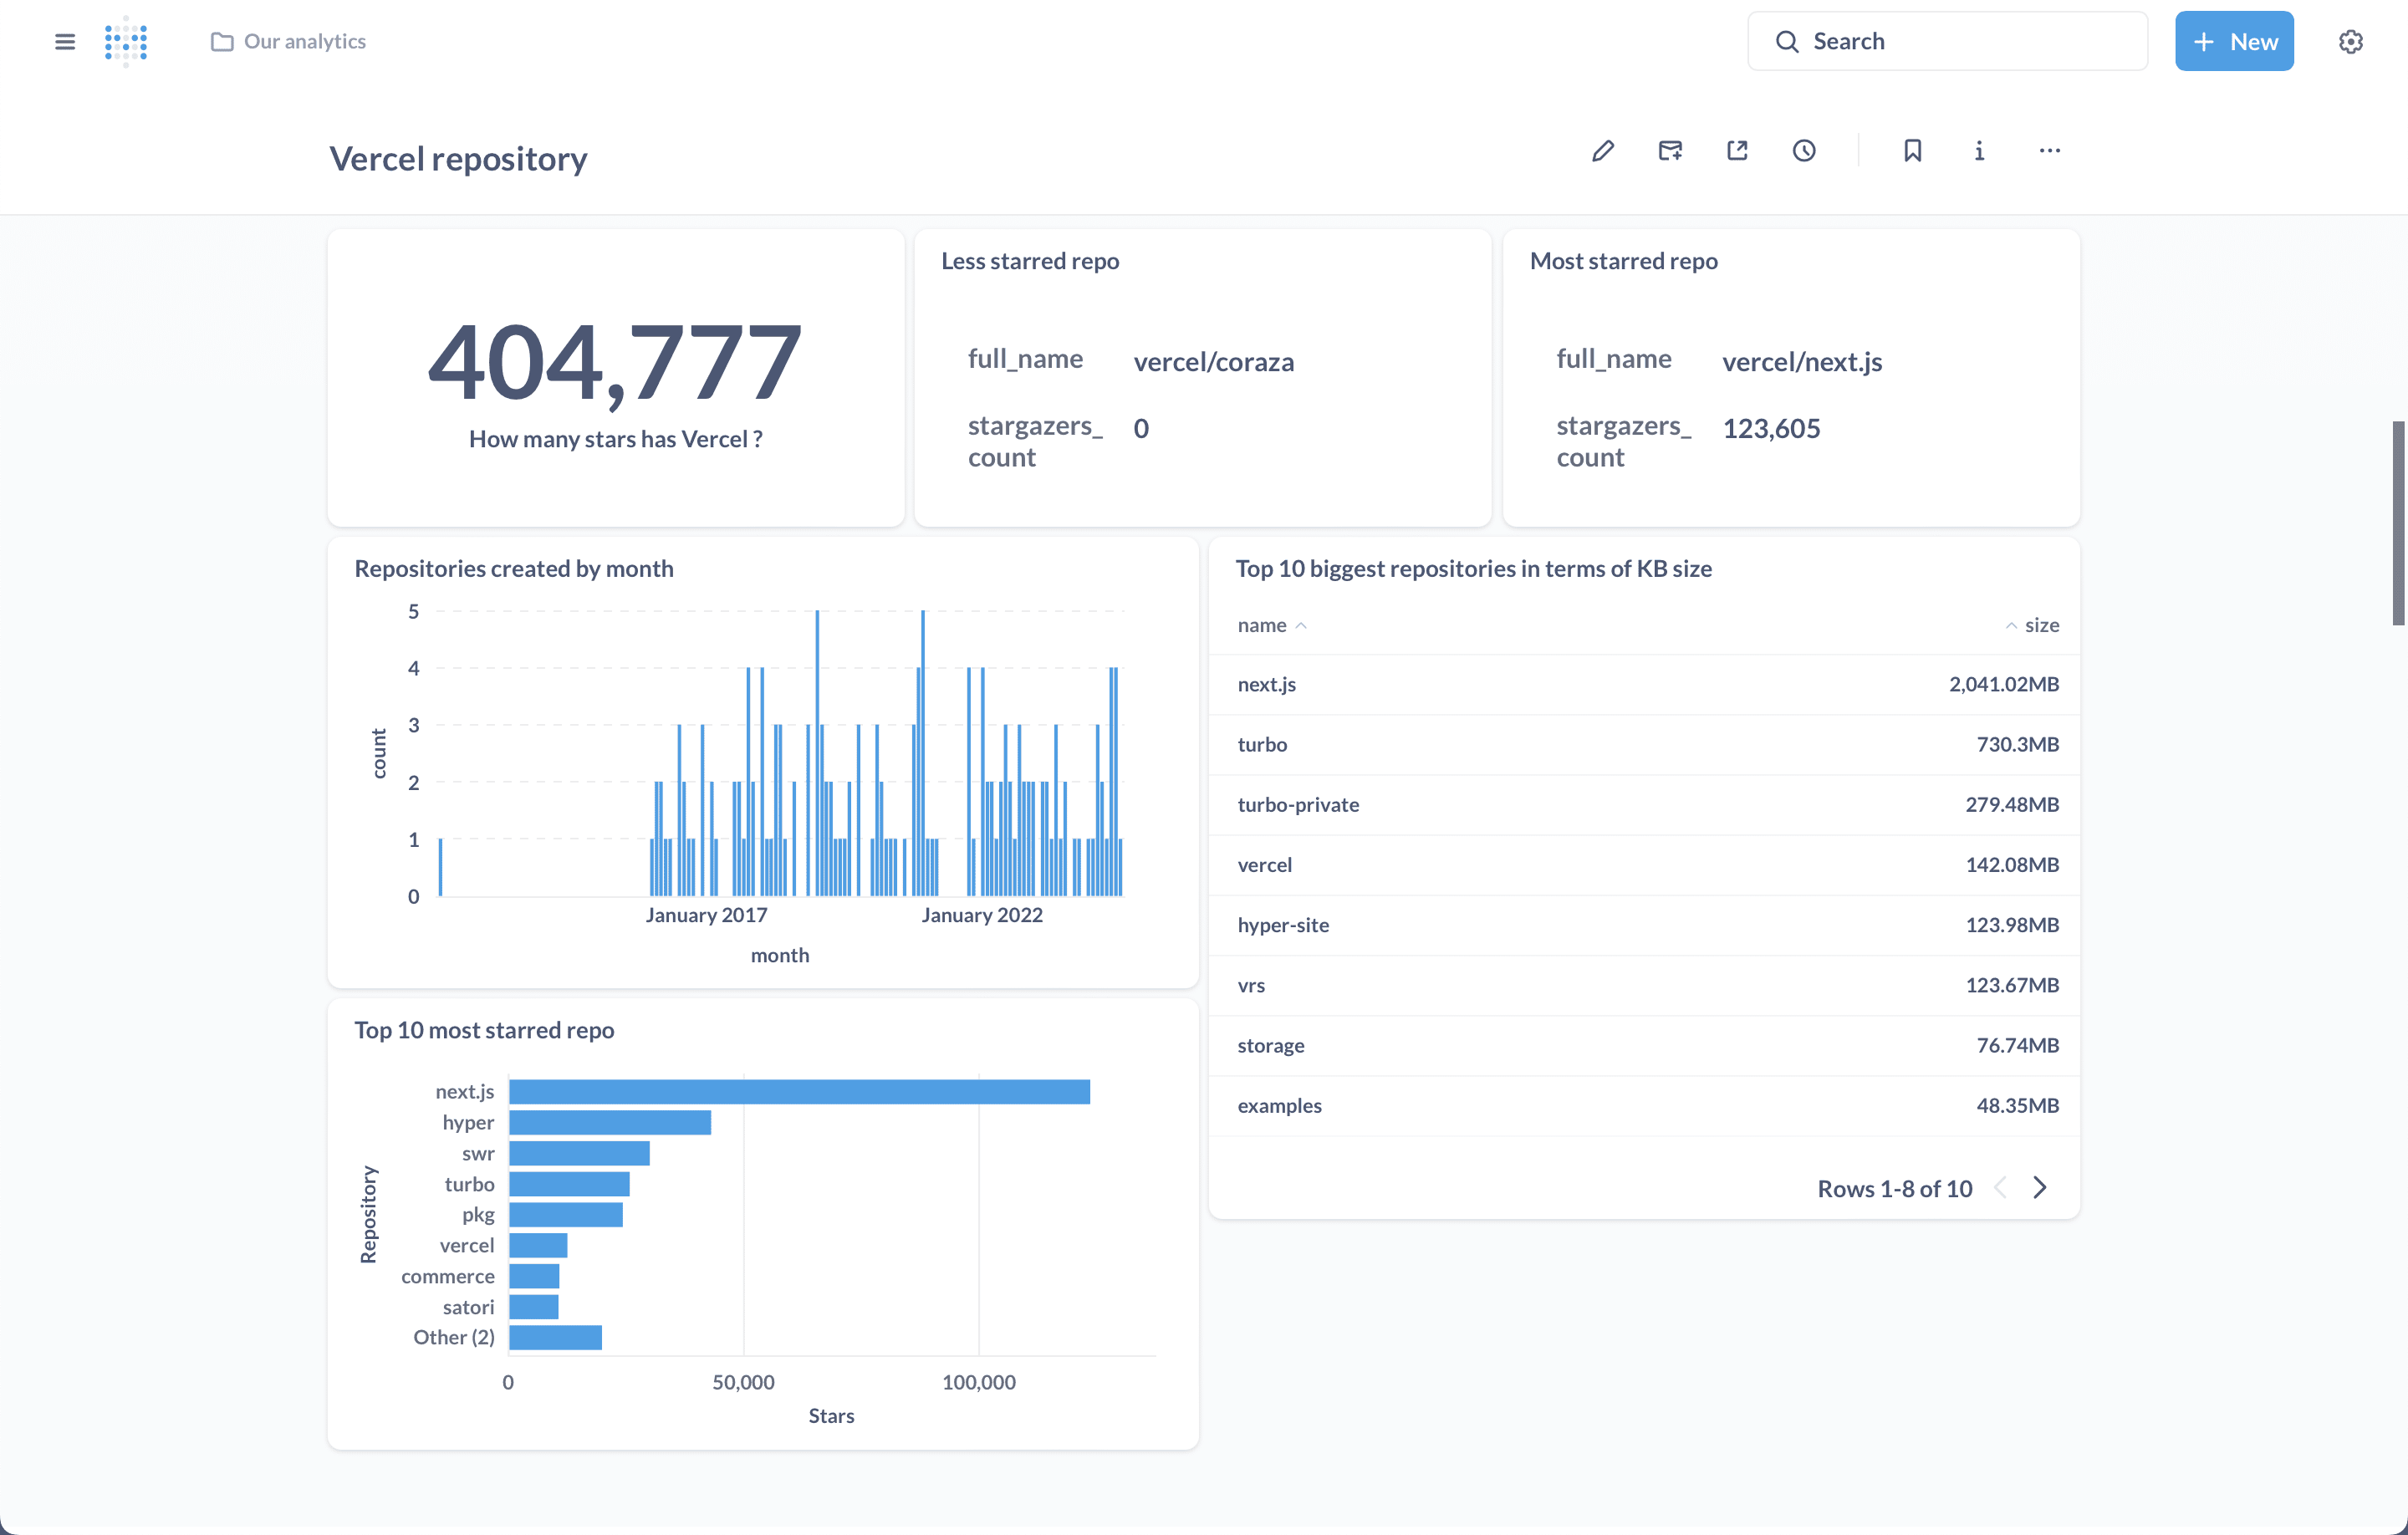
Create a Dashboard:
- Click on the
+ Newbutton on the top right and selectDashboard. - Add the questions you created to the dashboard.
- Arrange the visualizations as needed.
- Click on the
For example, here is a dashboard showing data from an Airtable database:
Conclusion
You have successfully connected Metabase to Anyquery and visualized an Airtable database. Now you can explore and visualize data from Airtable using Metabase. For more information on using Metabase, refer to the official Metabase documentation.
For troubleshooting and more details, refer to Anyquery troubleshooting and Metabase documentation.
