MySQL Workbench
MySQL Workbench is the de facto standard for MySQL database management. You can use it to explore and query data from anyquery. Let’s explore how to set up the connection.
Prerequisites
Section titled “Prerequisites”Before starting, ensure you have the following:
- A working installation of Anyquery
- MySQL Workbench installed on your machine
Starting MySQL Server
Section titled “Starting MySQL Server”First, start the MySQL server of Anyquery:
anyquery serverConnecting MySQL Workbench
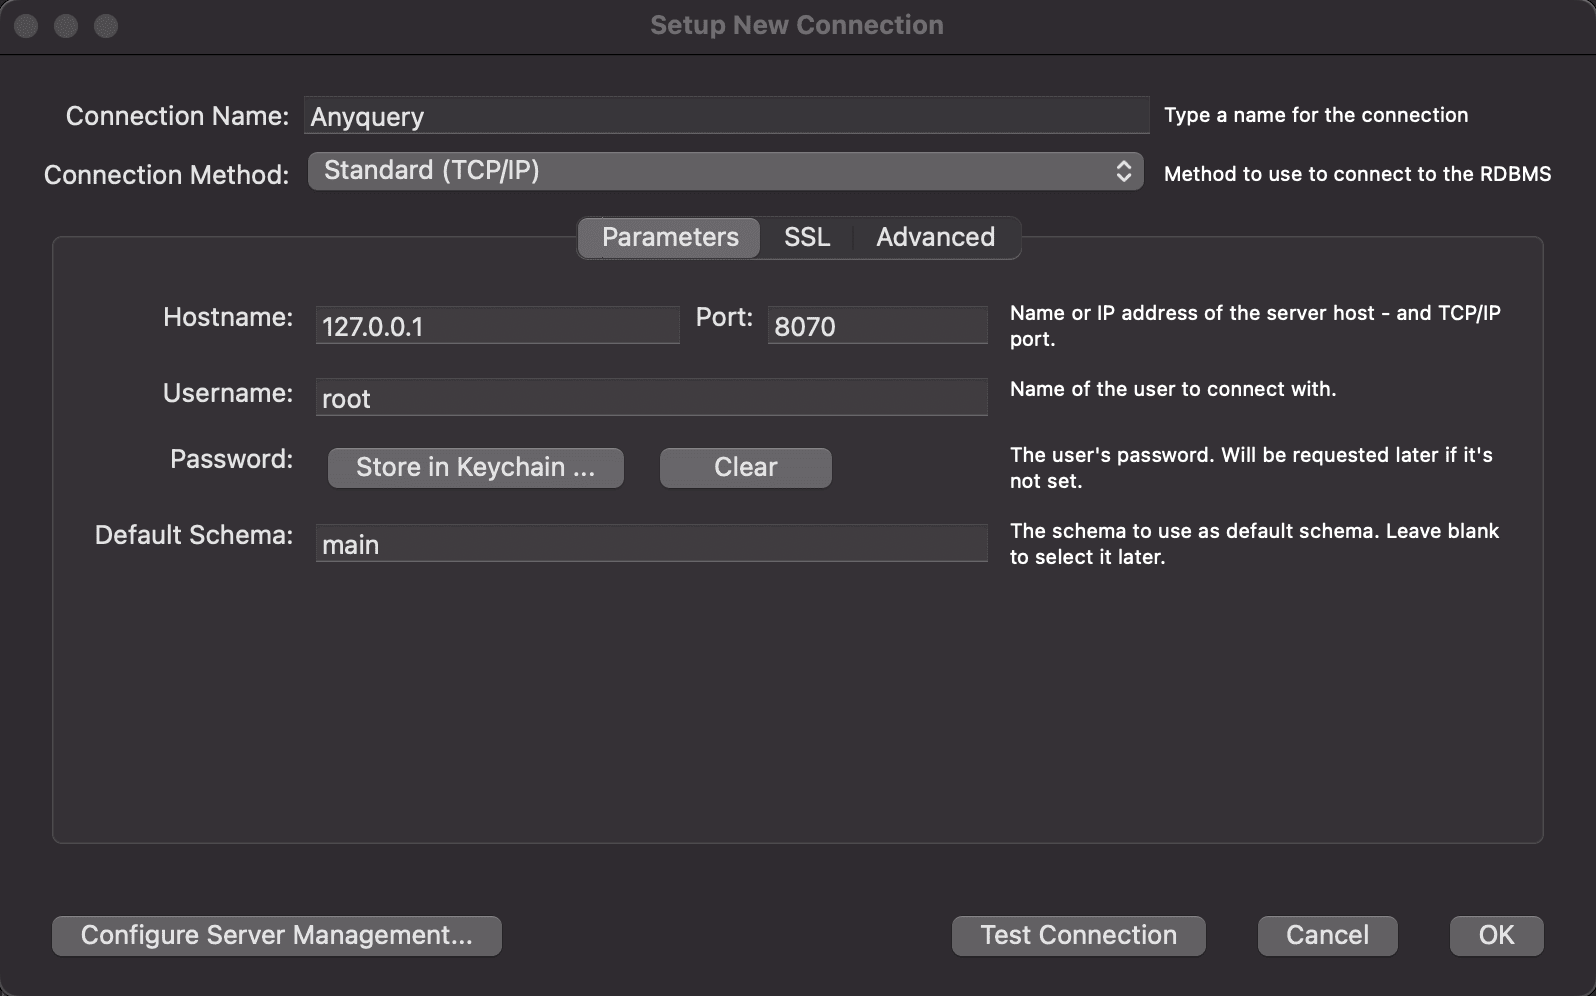
Section titled “Connecting MySQL Workbench”- Open MySQL Workbench and click on the
+icon (next toMySQL Connections) to add a new connection. - Fill in the following details:
- Connection Name: Enter any desired name for the connection.
- Connection Method: Select
Standard (TCP/IP). - Hostname:
127.0.0.1(replace it with another IP if Anyquery binds to a different IP). - Port:
8070(replace it with another port if Anyquery binds to a different port). - Username: Leave it as is unless you have set an auth-file.
- Password: Leave it empty unless you have set an auth-file.
- Default Schema:
main.
- Click on the
Test Connectionbutton to verify that the connection is successful. - If the test is successful, click on the
OKbutton to save the connection.
Exploring and Querying Data
Section titled “Exploring and Querying Data”Double-click on the connection to establish a connection to the server. You can see the list of databases and tables on the left sidebar. Right-click on any table to open the table inspector or select the first 1000 rows. You can also run SQL queries by clicking on the Query tab and typing your query.
Conclusion
Section titled “Conclusion”You have successfully connected MySQL Workbench to Anyquery. Now you can explore and query data from any source using MySQL Workbench.