Redash
Redash is a powerful business intelligence tool that allows you to create and share data visualizations. You can connect Redash to many data sources, including the MySQL server. Let’s explore how to set up the connection.
Prerequisites
Section titled “Prerequisites”Before starting, ensure you have the following:
- A working installation of Anyquery
- A Redash account
Step 1: Set up the connection
Section titled “Step 1: Set up the connection”First, launch the Anyquery server:
anyquery serverBecause Redash is a web-based tool, and anyquery binds locally, you need to expose the server to the internet. You can use a tool like ngrok to create a secure tunnel to your local server.
ngrok tcp 8070Copy the forwarding URL (e.g., tcp://0.tcp.ngrok.io:12345) and use it as the hostname in the next step.
Step 2: Connect Redash
Section titled “Step 2: Connect Redash”-
Open your redash instance in your browser.
-
Go to
{your-redash-url}/data_sources/new. -
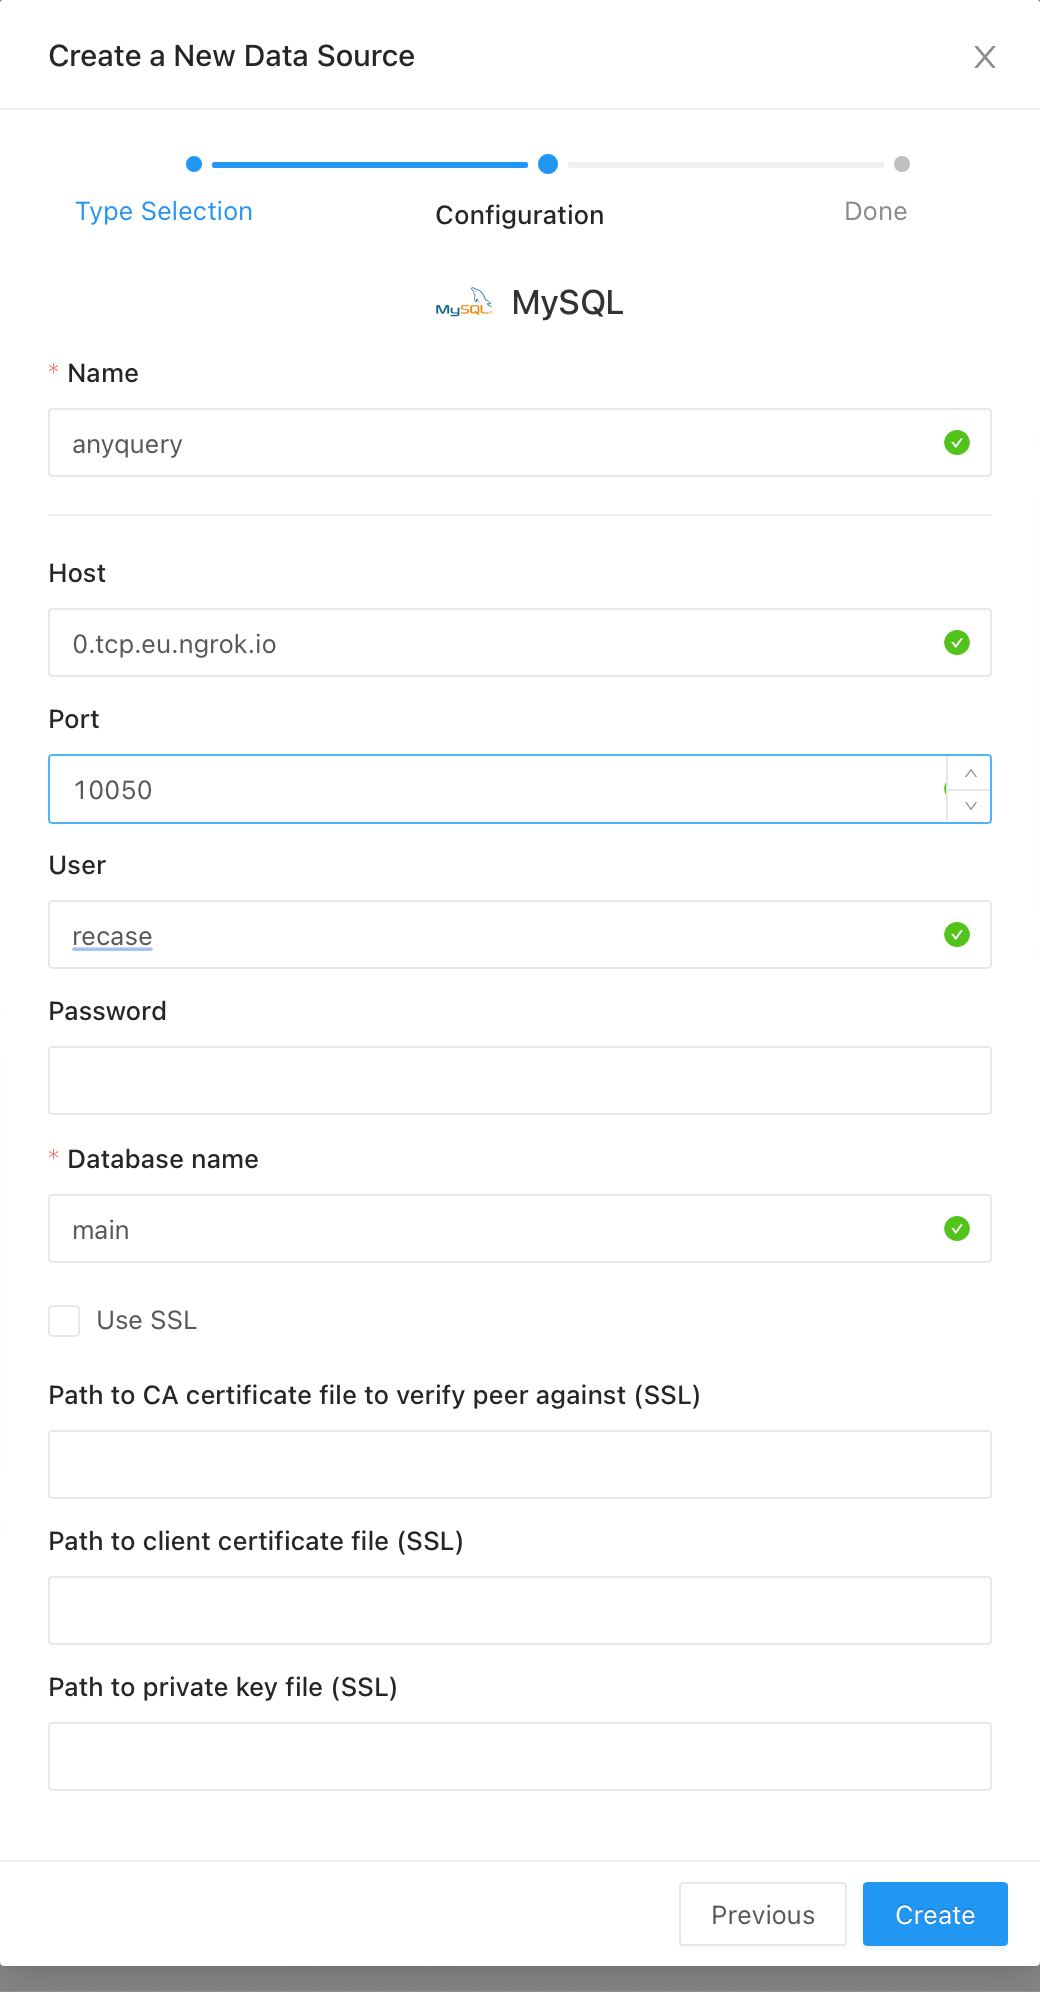
Select MySQL as the data source.
-
Fill in the following details:
-
Click on the
Createbutton to save the connection. Then click onTest Connectionto verify that the connection is successful.
Creating your first visualization
Section titled “Creating your first visualization”- Go to the Redash dashboard and click on the
+ New Querybutton. - Select the data source you just created.
- Write your query in the SQL editor. Often, you simply want to
SELECT * FROM table_name. Then, click on theExecutebutton. Finally, click on thePublishbutton to save the query. - Go to the dashboard and click on the
+ New Dashboardbutton. Input a name for the dashboard. - Add a new widget to the dashboard and select the query you just created.
Conclusion
Section titled “Conclusion”You have successfully connected Redash to Anyquery. Now you can explore and visualize data from any source using Redash.